If you use commas as decimal separators (common in the Netherlands, e.g. 1.234,56 instead of 1,234.56), make sure your CSV file uses a semicolon (;) as the delimiter so the data can be uploaded.
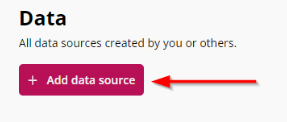
1. Log in to your account and make sure you are in the section "Data". Locate the "Add data source" button and click on it to initiate the import process.
2. In the provided fields, enter a descriptive name for the data source. Make sure the name clearly represents the type of dataset it is, as this helps collaborators understand its purpose. You may also optionally provide a description for further context.

3. Next, choose the delimiter that separates the values in your data file. You can select either a comma or a semi-colon as the delimiter. Once selected, click on the "import file" button to proceed (simply drag and drop the .csv file directly into the specified area).

4. Now you can browse your local system to select the desired .csv file. After selecting the CSV file, click on the "Open" button. The system will then start processing the file.

Data import size limits depend on your hardware, as data is encrypted locally on your device. Encryption can significantly increase file size, especially with text-heavy datasets, which can lead to slower encryption times.
Missing values can also lead to slower encryption times. Even though the original file size may be smaller, missing values still need to be represented in some way through the encryption process - so the encrypted file size can end up being larger, which increases processing time.
For example, on a version October 2023 MacBook Pro (M3 Pro, 18GB RAM):
Original datasets (no missing values):
- 134MB (text-heavy, 1m rows x 22 columns) → 701MB encrypted, ~2m45s
- 250MB (text-heavy, 2m rows x 14 columns) → 1.56GB encrypted, ~5m55s
- 440MB (mostly numeric, 3.7m rows x 12 columns) → 480MB encrypted, ~2m10s
- 134MB (file size is 119MB) → 930.79MB encrypted, 6m32s
- 250MB (file size is 209MB) → 1.82GB encrypted, 13m09s
- 440MB (file size is 360MB) → 959MB, 9m02s
5. Once the data file is imported, you have the option to edit any of the column names if necessary. You can also choose whether to include or exclude each column from the data source. By default, all columns are included automatically, so if there are any columns you don't want to include, simply deselect them.

6. Finally, click the "Encrypt" button to finalize the import of the .csv into the engine.

The data is now secret-shared over the different MPC nodes in your environment, and available for processing in crandas. As a data owner, you can delete it at all times.
Thank you for your time to read this article. If you have feedback or if you seek more information on specific topics, leave your comments below or reach out to support@rosemanlabs.com